standard coaxial

description
This gun is pretty much a standard coaxial gun with a standard coaxial piston valve.
features
- 4"x6' chamber
- 1.5" SDR21 x 8' sleeved golf ball barrel

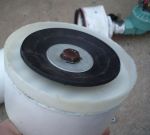
- bolt-in rear plug

- simple piston
- 3/4" modded sprinkler valve exhaust
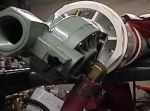
- hacked up bushing as a spacer

Problems with the initial threaded plug caused me to create the bolt-in plug  which worked surprisingly well. The plug is held in by 6 5/16" bolts and nuts that go through the coupler and bushing and into the hollow space
  between the inside and outside surfaces of the bushing. A homemade gasket
 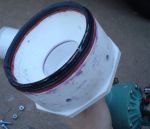 seals between the plug and the lip of the coupler. The bushing was sanded down a little so it could slide in and out of the coupler without trouble. A bit of extra gasket serves as a bumper for the piston.
The piston made of two parts that are common in most hardware stores and are designed to fit in the pipe. It is made of a PVC snap-in drain 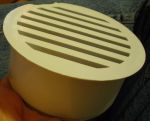 and a test plug. Both of these plugs had a ring that stops them from going completely inside the pipe; these rings were simply snapped off with pliers by flexing them back and forth. The two pieces were bolted together with a washer in the front and back
 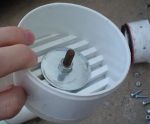 with a rubber washer to make the sealing surface. A rubber gasket
 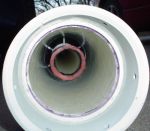 was also epoxied to the rear of the barrel to aid in sealing, but it isn't necessary if your pipe is cut smooth and square
The 3/4" sprinkler valve that exhausts the pilot was scrapped from my first project. At the time I didn't know that a 1" valve has nearly twice the flow, and at only a few bucks more than the 3/4", the 1" is definitely preferred. The mess of epoxy on the sprinkler valve around the schrader and pressure gauge shows my lack of experience and my lack of taps.
The spacer that keeps the barrel centered in the chamber was made out of a 4"x2" bushing that I attacked with a hacksaw because I wasn't yet confident in my ability to use power tools. It took awhile to cut everything down, but it resulted in a good solid spacer piece.
GGDT filegallery
background
This was the second spudgun that I built. I first stumbled into spudguns while trying to think of something to do with a hardware store gift card and some quick Internet research. I joined the Spudtech forums to do some further research after my initial gun was built, and I was impressed by the knowledge and helpfulness of the people in the forum. I soon heard about piston valves and wanted to build one, so I read through all the old posts in the pneumatic section to learn as much as I could. The spudding community wasn't what it is today and information on piston valves was scattered and somewhat vague. I gathered enough information to know how to build one from looking at pictures and some general descriptions. I didn't have a full grasp on how they worked, but I set out to build one anyway.
Luckily my research had taught me to use pressure rated pipe and primer when solvent welding, but I did end up using DWV fittings because I didn't know the difference at the time. Tracking down 1.5" SDR21 for the golf ball barrel was fairly easy, and I was able to find it at a local irrigation supply store. The 2" SCH80 that I sleeved it in was a pain though, I couldn't find anywhere that carried it. My dad eventually found one place that had it, but they wouldn't sell it to him because he didn't have a good reason to buy it. I eventually had to order it from McMaster-Carr, but the 10' piece had to ship via a freight service which cost $50 in shipping. To this day I still don't have a local source for SCH80 over 1", so if anybody knows a place that sells it in central Oklahoma please let me know.
Assembly was full of problems and very aggravating at times. The first problem was that the threaded fittings that I originally had at the end of the cannon would not seal no matter how much thread sealant or Teflon was used. Eventually the fittings were tightened down so hard that they would not come apart, and they still leaked. This is when the rear part was hacked off  and the coupler and bolt-in plug that you see in the pictures was devised to try and avoid threads all together. The plug ended up working quite well once I found an adequate gasket. Next up in the list of problems was getting the piston to fire. Since I lacked in-depth knowledge of piston valves at the time, I had to get advice from the helpful people over at the Spudtech forums. My problem, like most people who have problems with their piston valve, was that the piston was letting too much air pass even though I was using a sprinkler valve for the exhaust. Through trial and error of different pistons
  I was able to eventually find one that worked well. I also had issues with air leaking out the barrel. It was never a large leak there but it was something that took awhile to fix. The leak was there before I had to chop off the fittings in the back of the gun, so when that was cut off I epoxied a gasket onto the rear of the barrel to ensure a good seal was made there. Air was also leaking between the washer and the head of the bolt in the piston. It took me awhile to figure that out and I tried several things to fix it, but eventually I just epoxied it.
status/outlook
Due to the space that this gun takes up and my uneasiness over the DWV fittings, it has been decommissioned and disassembled.history
9/03 - Gun finished and video made1/06 - Gun disassembled and photos taken
7/07 - Most of this webpage created
6/08 - Links to photos added and page edited
related links
piston valve conceptspost on Spudtech

